Camera Calibration
Accurate camera intrinsics (focal length, principal point) are essential for precise tracking. On mobile with AR Foundation, intrinsics are provided automatically. On desktop with Native image source, you should calibrate your camera for best results.
When You Need Calibration
| Image Source | Intrinsics | Calibration Needed? |
|---|---|---|
| Injected (AR Foundation) | Provided per frame | No |
| RealSense | Read from firmware | No |
| Native (desktop camera) | Estimated or from file | Recommended |
| Sequence | Stored in recording | No (captured at record time) |
Without calibration, XRTracker estimates intrinsics from the camera's field of view. This is often sufficient for testing but can cause tracking inaccuracy — especially at object edges and with depth-sensitive poses.
Checkerboard Pattern
You need a printed 9x6 checkerboard pattern (10x7 squares, 9x6 internal corners).
You can also click Open Pattern in the calibration window to open the pattern directly.
How to print
- Print in landscape orientation at 100% scale (or "Fit to page" — margins are built in)
- Use matte paper — glossy paper causes reflections that confuse corner detection
- Mount on a flat, rigid surface (cardboard, clipboard) — any warping invalidates the calibration
Step-by-Step Calibration
Step 1 — Select Camera and Resolution
Open Tools > XRTracker > Camera Calibration from the Unity menu bar.
Under Camera Settings, select your camera from the Camera dropdown and choose the Resolution you plan to use for tracking.
Tip
Use the same resolution for calibration and tracking. Intrinsics are normalized so they technically work at any resolution, but calibrating at your target resolution gives the best accuracy.
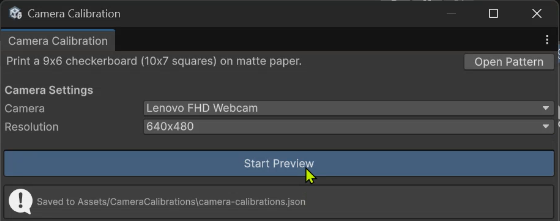
Step 2 — Start Preview
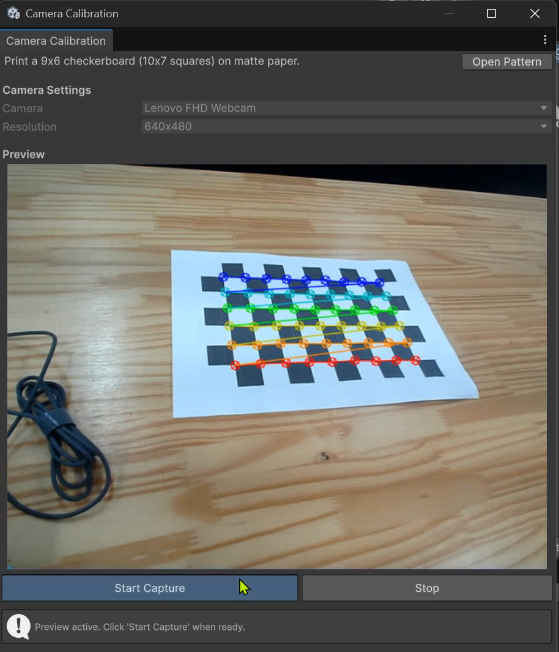
Click Start Preview. You should see the live camera feed in the Preview area.
Point the camera at the printed checkerboard. When the pattern is detected, colored dots and lines will appear overlaid on the checkerboard corners. This confirms the tool is recognizing the pattern. If the overlay doesn't appear, make sure the entire board is visible and well-lit.
Step 3 — Capture Calibration Images
Click Start Capture to begin collecting frames. The tool needs 25 images from different angles and positions. A progress bar and counter (e.g., "4/25") track your progress.
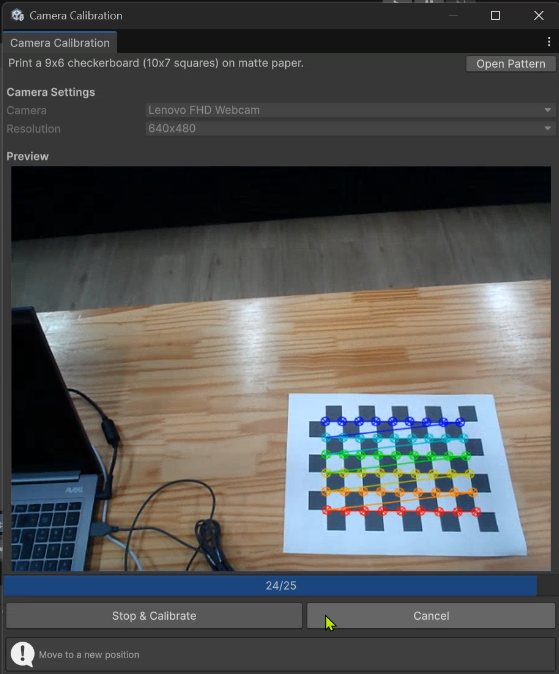
How to move the checkerboard:
- Cover all areas of the frame — move the board to the corners, edges, and center of the image
- Tilt at different angles — don't keep it flat; rotate and tilt in various directions
- Vary the distance — capture some frames up close and some farther away
- Hold still at each position — the tool captures when the board is stable
- After each successful capture, the status bar shows "Move to a new position"
Warning
Keep the entire checkerboard visible in the frame at all times. If corners go out of view, the tool can't detect the pattern.
Step 4 — Review Results
Once all 25 frames are captured (or you click Stop & Calibrate early with fewer frames), the tool computes the calibration and shows the Results section:
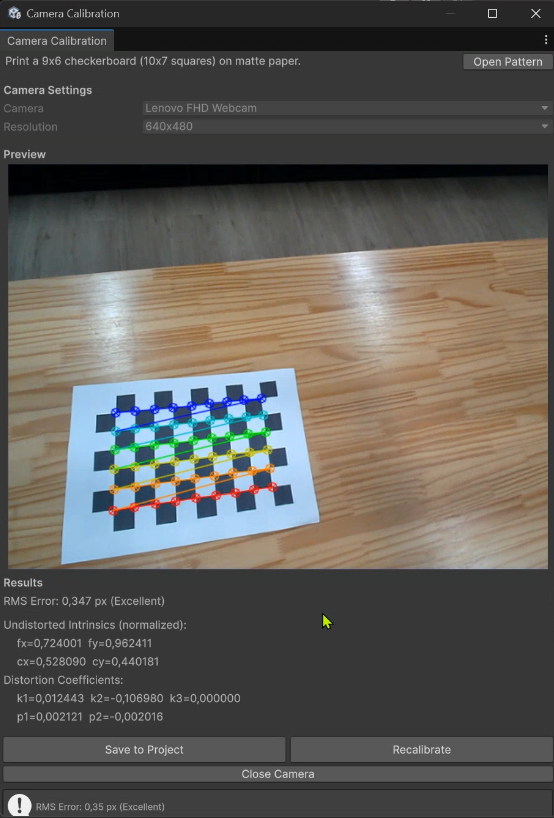
- RMS Error — the overall calibration accuracy
- Undistorted Intrinsics — normalized focal length (fx, fy) and principal point (cx, cy)
- Distortion Coefficients — radial (k1, k2, k3) and tangential (p1, p2) distortion
| RMS Error | Quality | Action |
|---|---|---|
| < 0.5 px | Excellent | Ready to use |
| 0.5 – 1.0 px | Good | Ready to use |
| > 1.0 px | Acceptable | Consider recalibrating with more diverse poses |
If the error is too high, click Recalibrate to start over.
Step 5 — Save to Project
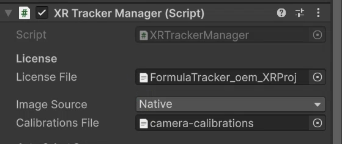
Click Save to Project. The calibration is saved to Assets/CameraCalibrations/camera-calibrations.json and automatically assigned to the Calibrations File field on your XR Tracker Manager component.
No manual setup needed — the calibration file supports multiple cameras, each matched by device name at runtime.
Tips for Good Calibration
- Cover the entire frame — move the pattern to all four corners and the center
- Vary the angle — tilt the board in different directions (not just head-on)
- Vary the distance — close and far captures improve the model
- Keep the board fully visible — all corners must be in frame for detection
- Avoid motion blur — hold the board still during each capture
- Good lighting — even lighting without harsh shadows or reflections
Note
Calibration is per-camera. If you switch cameras or the camera changes (e.g., different USB port mapping), recalibrate. The calibration file stores entries by device name, so multiple cameras can coexist.